Frugal Coupon Living

Stretching Your Pennies, Saving Your Dollars

  • Email
  • Facebook
  • Instagram
  • Pinterest
  • Twitter
  • Home
    • Home Page
    • About Ashley at Frugal Coupon Living
    • Contact
  • Shop
    • Frugal Coupon Living Shop
    • Etsy Store
    • TPT Shop
    • Elf Printables
    • Shipping Policy
  • Printables
    • Shop
    • All Printables
    • Free Printables Library
    • Free Elf Printables
  • Games
  • Party
  • Deals
  • Seasonal
    • Easter
    • Spring
    • April Fools Day
    • Mother’s Day
    • Father’s Day
    • Summer
    • Back to School
    • Halloween
    • Thanksgiving
    • Black Friday & Cyber Monday
    • Christmas
    • New Year’s Eve
    • Valentine’s Day
    • All Seasonal
  • Christian Resources
    • Christian Resources Shop
    • TPT Christian Crafts
    • Etsy Christian Prints
    • Youth Group Games
    • Sunday School Lessons
    • Scripture Cards
    • More Christian Resources

Easter Neon Deviled Eggs – Easy Colored Egg Tutorial

This post may contain affiliate links or ads. Read my privacy policy and disclosure policy here.

April 5, 2019 by Ashley at Frugal Coupon Living Filed Under: Easter, Frugal Living, Instagram, Pinterest, Recipe, Spring

published date: February 24, 2015
modified datt: April 05,2019

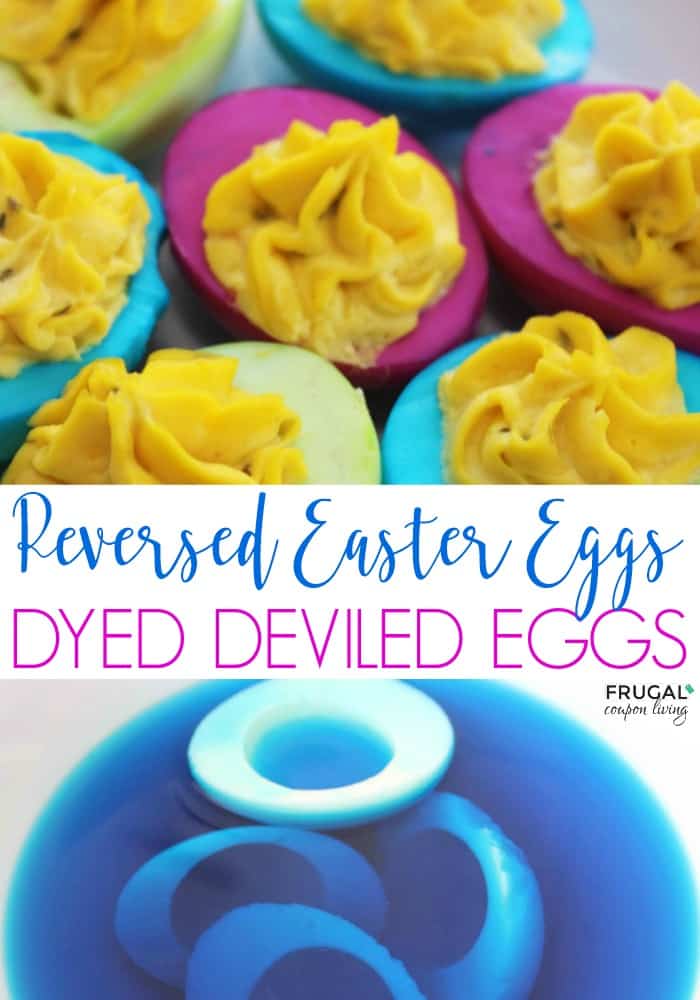
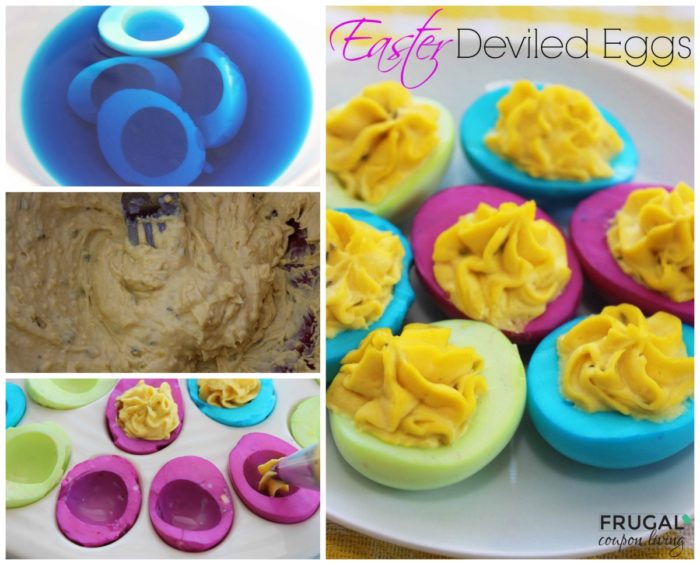
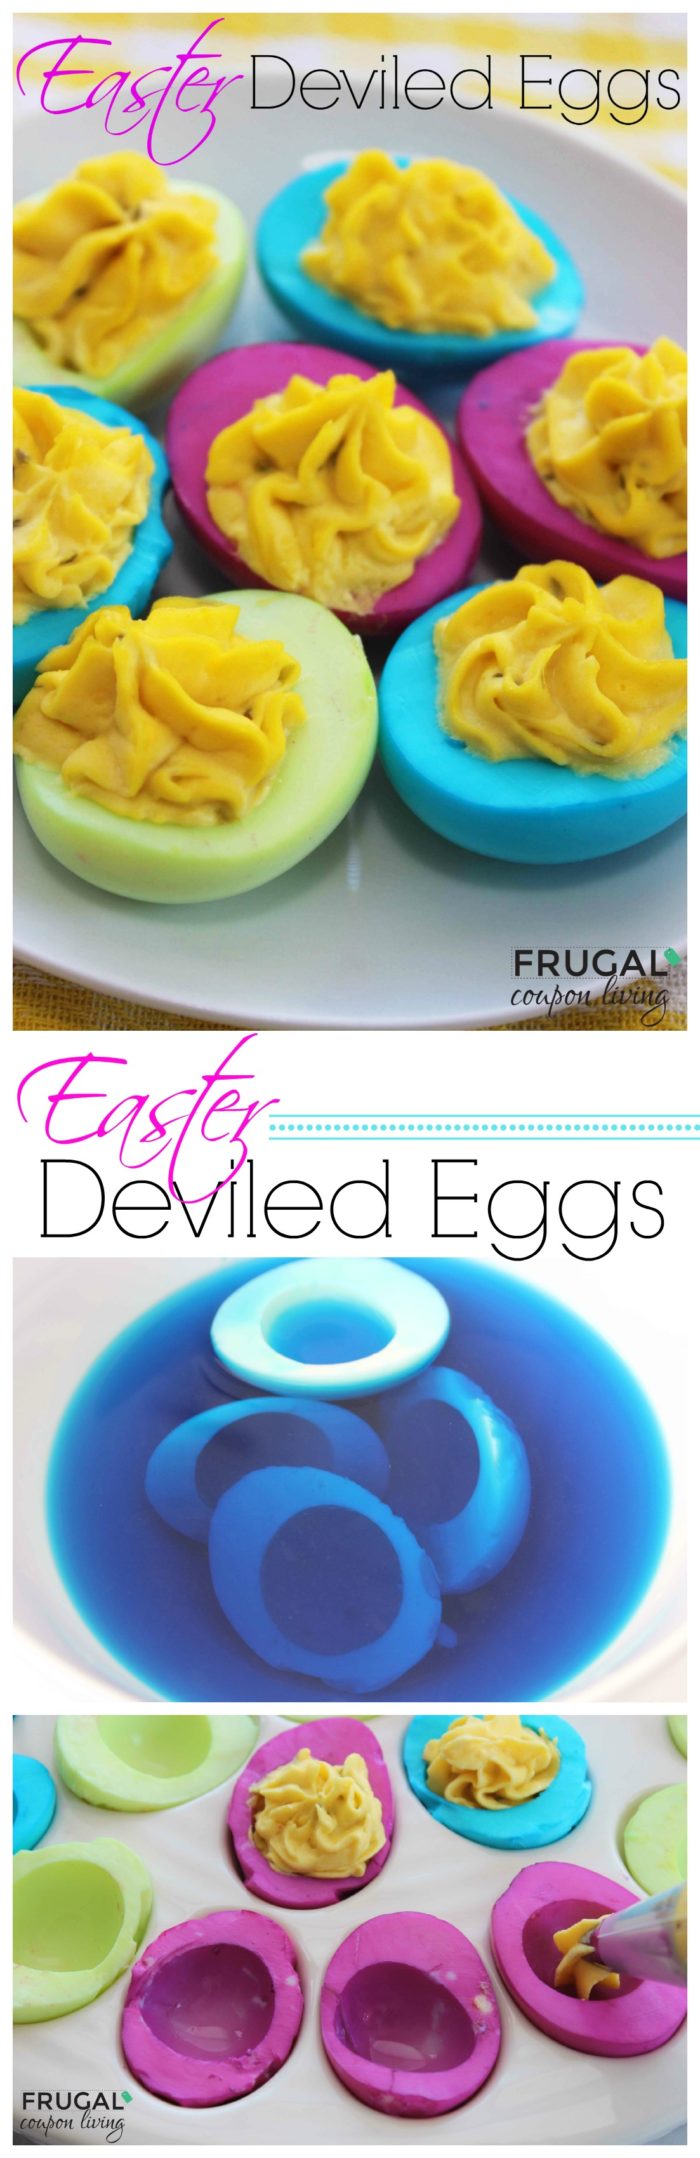
Dye the egg white, not the egg shell to create these Neon Deviled Eggs. This Easter egg dyeing technique creates a fun recipe outside your typical egg dye tutorial.

Easter Neon Deviled Eggs

easter-deviled-eggs-frugal-coupon-living-web

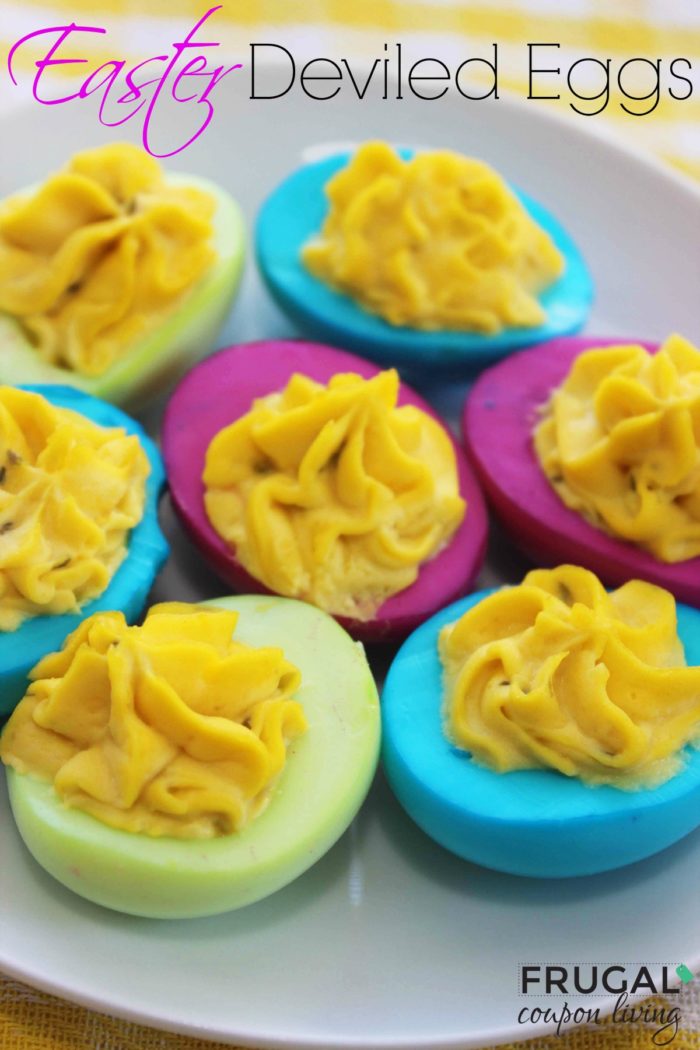
Ready for Spring? Consider this fun Kid’s Food Craft, and easy Easter Neon Deviled Eggs Tutorial. Go ahead and boil your eggs, then instead of coloring the shell, peel them and color the egg white – this fun recipe is another way to “color” hard boiled eggs!

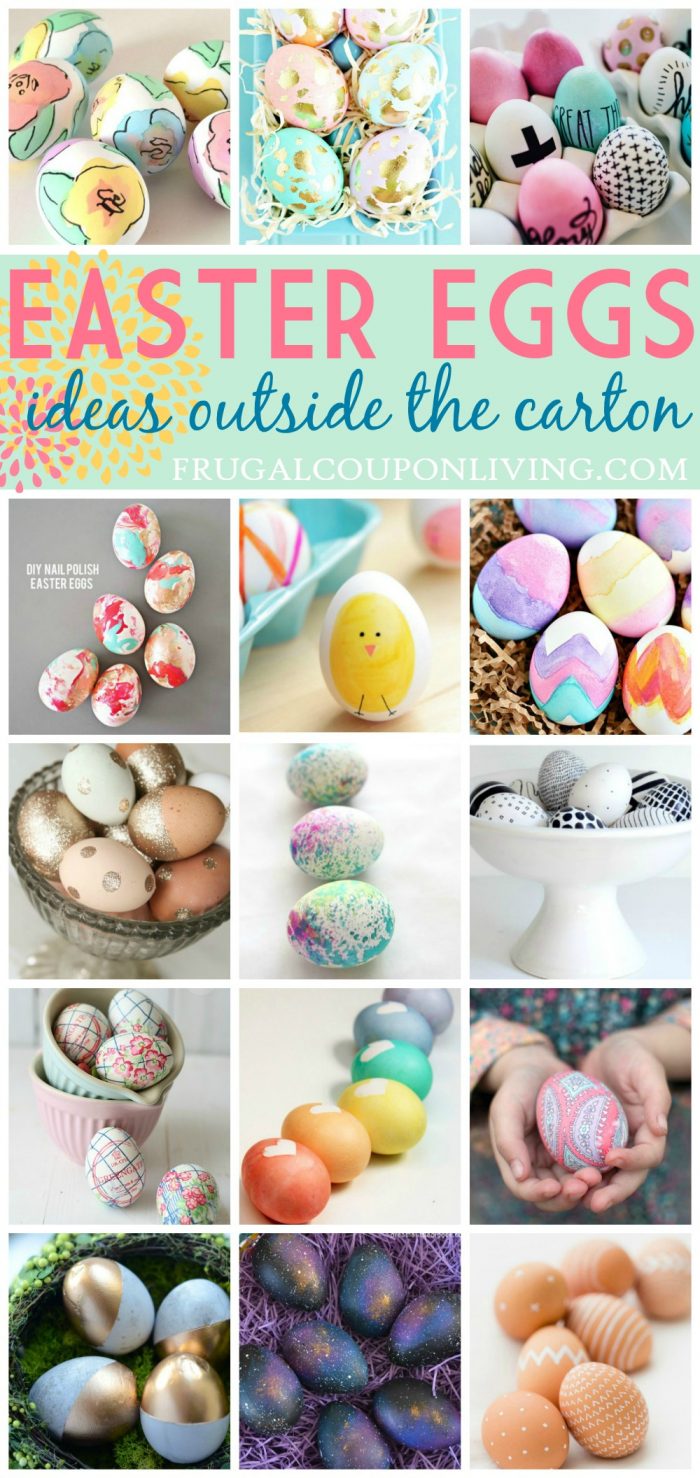
Go outside the box (or carton) with these other creative Easter Egg Dying Ideas.

Ingredients:

  • 12 Eggs
  • 1/2 cup Mayonnaise
  • 2 tbsp Sweet Pickle Relish
  • 4 tsp Mustard
  • Salt and pepper, for taste
  • Food coloring


Print
clock clock iconcutlery cutlery iconflag flag iconfolder folder iconinstagram instagram iconpinterest pinterest iconfacebook facebook iconprint print iconsquares squares iconheart heart iconheart solid heart solid icon

Easter Neon Deviled Eggs – Easy Colored Egg Tutorial

  • Author: Ashley at Frugal Coupon Living
Print Recipe

Ingredients

Scale
  • 12 Eggs
  • 1/2 cup Mayonnaise
  • 2 tbsp Sweet Pickle Relish
  • 4 tsp Mustard
  • Salt and pepper, for taste
  • Food coloring

Instructions

  1. Place eggs in a pan and cover with cold water.
  2. Bring to a boil, cover and turn off heat.
  3. Allow to sit for 9 minutes.
  4. Fill with cold water to stop cooking.
  5. Remove shells.
  6. Slice eggs in half lengthwise.
  7. Remove yolks and place in a bowl.
  8. Fill bowls with 1 cup cold water and 6 drops of food coloring.
  9. Divide cooked egg white halves evenly between the different colors.
  10. Allow whites to sit for 15 minutes or until desired color is reached.
  11. Place Colored egg whites on paper towels to dry.
  12. Mash yolks with a fork and stir in mayonnaise, pickle relish, and mustard.
  13. Salt and pepper, to taste.
  14. Mix until consistency is smooth and creamy.
  15. Transfer mixture to zippered bag or piping bag and clip corner for piping.
  16. Pipe mixture into cooked egg whites and refrigerate until ready to serve.

Did you make this recipe?

Tag @frugalcouponliving on Instagram and hashtag it #frugalcouponliving

Recipe Card powered byTasty Recipes

Directions:

First, place eggs in a pan and cover with cold water.

Bring your water to a boil, cover and turn off heat.

Allow to eggs to sit for 9 minutes.

Fill your bowl cold water to stop cooking.

Slowly and carefully remove your shells.

Next, slice eggs in half lengthwise.

Remove yolks and place in a bowl.

Fill another bowl with 1 cup cold water and 6 drops of food coloring.

Divide cooked egg white halves evenly between the different colors – we did blue, green and pink.

Allow whites to sit for 15 minutes or until desired color is reached (longer for darker, shorter for lighter.)

Next, place Colored egg whites on paper towels to dry.

Move over to your yolks. Mash yolks with a fork and stir in mayonnaise, pickle relish, and mustard.

Add salt and pepper as needed to taste.

Mix until consistency is smooth and creamy.

Transfer mixture to zippered bag or piping bag and clip corner for piping.

Pipe mixture into cooked egg whites and refrigerate until ready to serve.

Enjoy!

easter-deviled-eggs-Collage


Share-Post-on-Pinterest-Frugal-Coupon-Living

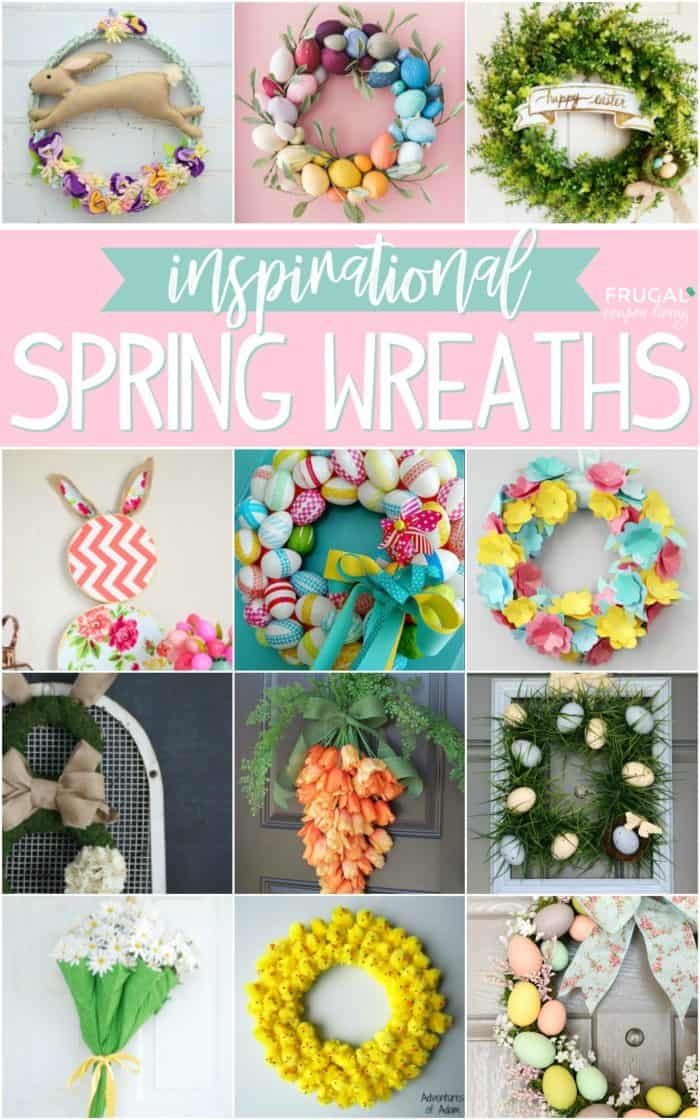
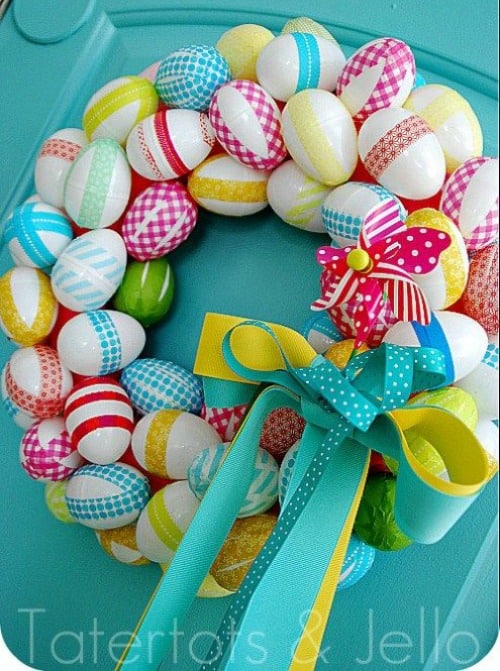
Looking for something else cool? Look at these Easter Egg Dying Ideas – Thinking outside the carton! Pin to Pinterest.

easter-egg-ideas-frugal-coupon-living

Also enjoy these Easter Food Craft Ideas for the Kids. Pin to Pinterest.

frugal-coupon-living-signature-green


WHAT’S TRENDING? Looking for a few engaging activities? Grab Minute to Win it Games – Traditional, Holiday, Group, and more! Use these fun activities in the office, classroom, or at your next birthday party.

Easy Dairy Free Recipes and Snacks for Nursing Mothers

This post may contain affiliate links or ads. Read my privacy policy and disclosure policy here.

April 4, 2019 by Ashley at Frugal Coupon Living Filed Under: Facebook, Instagram, Pinterest, Recipe, Social Media

published date: June 17, 2018
modified datt: April 04,2019

Dairy Free Recipes for a Dairy Free Diet. Tasty recipes and lactation suggestions that won’t make a nursing mother feel like she is sacrificing. Easy dairy free snack ideas for breastfeeding mothers.

Dairy Free Recipes

Easy Dairy Free Recipes and Snacks for Nursing Mothers

Nursing the twins has been rather hard. First, they were born early and never got a good latch. Coming from a mother that breastfed her first three children, the extra steps required were going to take me being attached to a breast pump rather than my precious newborns. Once the routine of pumping became the norm, I started noticing colic in Henry. This was around 7 weeks of age. In addition to the colic, Henry was constipated and having alot of projectile vomit with mucus. I researched potential reasons and we eliminated dairy from my diet. This seemed to do the trick and thus began the sacrifice of not only pumping, but additionally changing my diet and sacrificing my favorite foods.

I made the mistake with my third born of creating a healthy diet and lowering my calorie intake. Happily, I lost my baby weight but sadly, I also lost my supply, Since I was trying to keep up a supply for twins, I began searching Dairy Free Recipes to go with my new Dairy Free Diet. Many of these recipes have the intent of still supplying calories and still remaining tasty. Additionally, I researched some recipes that support lactation and breast milk production. My goal in this post was not to overload you with meats and veggies (because that is obviously an easy elimination to dairy) but to supply you with tasty eats, so you don’t feel like your diet is a sacrifice.

Helpful tip: OREOs were my best friend. Did you know OREOs are dairy free? They totally helped me with cravings that often had diary.


Primary Sources of Dairy:

  • Milk
  • Cheese
  • Butter
  • Half-and-half
  • Cream
  • Buttermilk
  • Cream Cheese
  • Sour Cream
  • Cottage Cheese
  • Whey
  • Cottage Cheese

First up, baking was particularly hard on me. I found this Dairy Free Conversions Chart and it was pretty convenient for pretty much everything involves milk, cream or butter!

5-Ingredient No-Bake Blueberry Almond Energy Snacks | The Seasoned Mom

Spring Rolls with Peanut Sauce | Happy Kitchen Rocks

Buckwheat Carrot, Date and Walnut Muffins | Nourish Every Day

Healthy Chocolate Chip Banana Muffin Recipe – Sweetened with bananas, honey and applesauce, these moist and tender muffins are great for a quick grab-and-go breakfast. | Saving Room for Dessert

Easy Instant Pot Coconut Milk Yogurt | Allergy Free Alaska

Pumpkin Spice Roasted Chickpeas | Strength and Sunshine

Cauliflower Popcorn | Rozas

Baked Veggie Nuggets | Unbound Wellness

Zucchini Bread with Chocolate Chips | Well Plated

Chocolate Chip Lactation Cookies with whole oats, healthy flaxseed meal, and brewer’s yeast to help breast feeding moms maintain their milk supply. | Tastes Lovely

Mediterranean Vegetables (Grilled or Roasted) | Go Dairy Free

Baked Apple Chips | The Viet Vegan

Banana Sushi | Fit Foodie Finds

Spicy Kale Chips | Purely Katie

Dairy Free Recipes for a Dairy Free Diet. Tasty recipes and lactation suggestions that won't make a nursing mother feel like she is sacrificing. Easy dairy free snack ideas for breastfeeding mothers. Click to Tweet

Allergy Soft Pretzel Bites | Super Healthy Kids

Zucchini Pesto Roll Ups | The Fitchen

Raw Cookie Dough Bites | Southern in Law

Crunchy Peanut Butter Granola Bars | Minimalist Baker

Scallion Pancakes | Go Dairy Free


Easy Dairy Free Recipes and Snacks for Nursing Mothers

We love these Paleo Recipes, many diary free! Pin to Pinterest.

Take a look at these Whole30 Recipes, many dairy free! Pin to Pinterest.


WHAT’S TRENDING? Looking for a few engaging activities? Grab Minute to Win it Games – Traditional, Holiday, Group, and more! Use these fun activities in the office, classroom, or at your next birthday party.

Inspirational Spring Easter Wreaths

This post may contain affiliate links or ads. Read my privacy policy and disclosure policy here.

March 29, 2019 by Ashley at Frugal Coupon Living Filed Under: Easter, Facebook, Instagram, Pinterest, Social Media, Spring

published date: March 03, 2019
modified datt: March 29,2019

The best way to welcome a new season is to display festive decor on your door. Celebrate eggs, bunnies, flowers & moss with these Inspirational DIY Spring Easter Wreaths.

Inspirational Spring Easter Wreaths

“Hippity hop hop, Easter’s it’s way…”

Since we moved to DC, our front door decor has been lacking. Mostly because our wreaths didn’t fair well in the move but also because we went from having a front porch to a stoop. This means all my outdoor decor had to either be prepared only to last one year or had to have the ability to get wet. I went for plan A on most of the seasons, replacing my front door seasonal decor every year – no, it wasn’t the frugal way to go about things. However, I learned if I could craft my own projects, seasonal door decor because a little bit more affordable than buying a brand new wreath every year.

Spring Easter Wreaths

With myself in mind and you all secondary (chuckle… I cannot tell you how many posts are created because I am searching for something for our home), I found some of the best Inspirational DIY Spring Easter Wreaths for your front door. Let us all welcome flowers and eggs and wave good-bye to snow and frost!

Come on in Peter Rabbit, see you next year Elsa and Olaf!

Hometalk really went outside the box with this creative Spring Easter Wreath! Turn tulips upside down into a festive carrot wreath. | Hometalk

Grab your spring fabrics and two embroidery hoops. Add pom-pom tail to make the cutest Easter Bunny ever! This wreath is perfect for indoors. | Design Improvised

Welcome spring with this rainbow Easter egg wreath! Skip the mess of dying by using crepe paper instead! | The House that Lars Built (I think this is one of the most talented, creative blogs!)


This is a simple DIY spring Easter wreath with some Pottery Barn Inspiration. We love it. | Details Blog

Guess what makes this adorable Easter Bunny Wreath. Moss Ribbon. Add it to your craft cabinet. | House by Hoff

Jen is always so talented. Grab your plastic Easter eggs and Washi Tape for this spring Easter wreath tutorial. (Also seen in our Spring and Easter Home Decor Ideas.) | Tatertots and Jello

Brighten up your door with this DIY Spring Easter Wreath made using an incredibly easy simple paper flower technique. | Gathering Beauty

You will never guess what makes up these carrots…. and for some humor, I love how the bloggers incorporates dialogue in her images (get ready to giggle!) | Paint Yourself a Smile

This mama is the queen of tulip wreaths! How pretty is this peach Easter tulip wreath on a teal door? It makes me want to paint my door. | The How to Mom

Only two supplies required for this Farmhouse Egg Grapevine Wreath. It is incredibly simple. | Live Laugh Rowe

Is this not the cutest thing you have ever seen? This DIY Spring Chick Easter wreath requires only two supplies. We found 36 Easter Chicks available online. | Adventures and Play

Simple DIY hoop wreath that’s busting with tulips and a macrame detail. Modern but with a farmhouse touch. This technique used the twine took me back to my childhood friendship bracelet days. | Clumpsy Crafter

This spring pom pom wreath wrapped in twine is inspiring – perfect for any crafter. I would love to perfect a pom pom like that! | Lil Luna

How cute is this Easter wreath from Shelly? Adorable and springy and best of all, affordable, it is made from Dollar Store supplies! | 100 Things 2 Do

Get inspired by the multiple spring floral umbrella wreaths this Easter by Jill.  (Also seen in our Spring and Easter Home Decor Ideas.) | One Good Thing by Jillee

The best way to welcome a new season is to display festive decor on your door. Celebrate eggs, bunnies, & moss with these DIY Spring Easter Wreaths. #FrugalCouponLiving #Easter Click to Tweet

This blooming egg Spring Easter Wreath is homemade and fun! | A Pumpkin and a Princess

Guess what creates these natural flowers? This wreath is made of wooden spoons – who knew!? | Blitsy

Get square! Grab a frame and get crafting with this picture frame and Easter grass. | The CSI Project

If you sew, download this free bunny Spring Easter wreath pattern and tutorial. | Bustle and Sew

These flowers pop! This spring wreath is made entirely out of gift wrap! | Whimziville

How adorable is this Easter wreath stand? A quick and easy tabletop spring wreath with an organic feel. | The Art of Doing Stuff


We think you will also love these Free Easter Printables You Want this Spring! Pin to Pinterest.

Get inspired by this Inspiring Farmhouse Easter Decor. Pin to Pinterest.

Take a look at these Easter Egg Dying Ideas Outside of the Carton. Pin to Pinterest.


WHAT’S TRENDING? Looking for a few engaging activities? Grab Minute to Win it Games – Traditional, Holiday, Group, and more! Use these fun activities in the office, classroom, or at your next birthday party.

March Madness Basketball Rice Krispies

This post may contain affiliate links or ads. Read my privacy policy and disclosure policy here.

March 29, 2019 by Ashley at Frugal Coupon Living Filed Under: Facebook, Instagram, Pinterest, Recipe, Social Media

published date: January 31, 2019
modified datt: March 29,2019

Get a slam dunk with these March Madness easy Basketball Rice Krispies. Perfect for the final four playoffs or a basketball sports themed party.

Slam Dunk Basketball Rice Krispies

March Madness Basketball Rice Krispies

Did you know the game of basketball began in the late 1800s by a PE instructor looking to have a sport with less impact than football. This loved sport was born in  1891 in the heartland of Springfield, Massachusetts. It eventually ended up as an American college sport before it became a pro-league sport. There is your slam dunk jeopardy factor for the day!

Rice Krispie Treats for All Seasons

We love making Rice Krispie Treats for all seasons including the season of basketball! These Basketball Rice Krispies are perfect for watching the big game or for celebrating a year of life at a basketball or sports themed birthday party. Using a traditional rice krispies treat, the extra steps like shaping and icing your basketballs, are incredibly simple!

Enjoy!

Basketball Rice Krispies Ingredients:

  • 16 oz bag marshmallows
  • 7 cups Rice Krispies cereal
  • 3 tablespoons softened butter
  • Vanilla frosting
  • Orange food coloring
  • 2 cups light cocoa candy melts


Basketball Rice Krispies Supplies:

  • Decorating bags
  • Large microwave safe bowl
  • Small mixing bowl
  • Long spoon
  • 9×13” pan
  • Non-stick cooking spray
  • 4-5” circle cookie cutter


Print
clock clock iconcutlery cutlery iconflag flag iconfolder folder iconinstagram instagram iconpinterest pinterest iconfacebook facebook iconprint print iconsquares squares iconheart heart iconheart solid heart solid icon

March Madness Basketball Rice Krispies

  • Author: Ashley at Frugal Coupon Living
Print Recipe

Ingredients

Scale
  • 16 oz bag marshmallows
  • 7 cups Rice Krispies cereal
  • 3 tablespoons softened butter
  • Vanilla frosting
  • Orange food coloring
  • 2 cups light cocoa candy melts

Instructions

  1. First, in a large bowl, combine your marshmallows and butter and heat in the microwave for 1-2 minutes and mix.
  2. Mix in a few drops of orange food coloring. Be conservative. Add as needeed.
  3. Next, mix in your Rice Krispies cereal until your cereal is evenly covered in your marshmallow mixture.
  4. Grab your 9×13″ baking pan and grease it.
  5. Press your Rice Krispies mixture into your pan firmly.
  6. Let Rice Krispies set for a few hours or in the freezer for 15 minutes and use a circle cookie cutter to cut out basketball shaped Rice Krispies.
  7. Mix your can of frosting with orange food coloring and place in a decorating bag.
  8. Frost each basketball Rice Krispie treat.
  9. In a small microwave safe bowl, heat 2 cups of light cocoa candy melts on 50% power for 2 to 3 minutes, stirring every 30 seconds until melted.
  10. Finally, fill a decorating bag with the melted chocolate and use to draw the lines on each basketball Rice Krispie Treat.

Did you make this recipe?

Tag @frugalcouponliving on Instagram and hashtag it #frugalcouponliving

Recipe Card powered byTasty Recipes
Get a slam dunk with these March Madness easy Basketball Rice Krispies. Perfect for the final four playoffs or a basketball sports themed party. #FrugalCouponLiving #marchmadness #basketball Click to Tweet

Basketball Rice Krispies Directions:

First, in a large bowl, combine your marshmallows and butter and heat in the microwave for 1-2 minutes and mix.

Mix in a few drops of orange food coloring. Be conservative. Add as needed.

Next, mix in your Rice Krispies cereal until your cereal is evenly covered in your marshmallow mixture.

Grab your 9×13″ baking pan and grease it.

Press your Rice Krispies mixture into your pan firmly.

Let Rice Krispies set for a few hours or in the freezer for 15 minutes and use a circle cookie cutter to cut out basketball shaped Rice Krispies.

Mix your can of frosting with orange food coloring and place in a decorating bag.

Frost each basketball Rice Krispie treat.

In a small microwave safe bowl, heat 2 cups of light cocoa candy melts on 50% power for 2 to 3 minutes, stirring every 30 seconds until melted.

Finally, fill a decorating bag with the melted chocolate and use to draw the lines on each basketball Rice Krispie Treat.


Take a look at these other March Madness Food Game Day Recipes. Pin to Pinterest.

Also take a loo at these Winning Super Bowl Snacks. Pin to Pinterest.


WHAT’S TRENDING? Looking for a few engaging activities? Grab Minute to Win it Games – Traditional, Holiday, Group, and more! Use these fun activities in the office, classroom, or at your next birthday party.

Upcycled Farmhouse Bow Holder Picture Frame

This post may contain affiliate links or ads. Read my privacy policy and disclosure policy here.

March 29, 2019 by Ashley at Frugal Coupon Living Filed Under: Crafts, DIY, Facebook, Instagram, Pinterest, Social Media

published date: January 19, 2019
modified datt: March 29,2019

Upcycle an old frame with this Farmhouse Bow Holder craft. This hair bow holder brightens a girls bedroom or brings style to a kid’s bathroom. 

Farmhouse Bow Holder Picture Frame

Upcycled Farmhouse Bow Holder Picture Frame

If you read often, you know I have five kids. The first two are girls (ages 9 and 10) and they are quickly aging out of the hair bows. The youngest 3 are boys (ages 2 and under – surprise twins). That being said, my ten years of making picture frame hair bow holders are coming to an end. I wanted to give you one last craft before we hang up our last bow and call it the end to an era!

With this frame, we went a different direction. I decided to add a fabric backing this year. In the past, I did open picture frame with no fabric backing, but this year I wanted to offer a solution. With my older frames, I would put my hair clip on a ribbon and I would work really hard to not scrape the wall with the alligator clip. Having the fabric backing, offers a solution to my biggest problem (scratched walls!)

Place this hair bow holder in a kids bathroom or a girls bedroom!

Upcycled Farmhouse Bow Holder Picture Frame Supplies:

  • Old (or brand new) picture frame
  • White spray paint
  • Cotton fabric of choice
  • 7/8” – 1.5” Ribbon of choice
  • Hot glue/hot glue gun
  • Tape measure
  • Sand paper
  • Scissors
  • Garbage bags or paper bags


Hair Bow Holder Craft

Upcycled Farmhouse Bow Holder Picture Frame Directions:

First, carefully take apart your frame, removing the glass and all backing like staples, nails, hooks, etc.

Take your frame outside and lay out plastic or paper bags. Place your frame on top.

Spray Painted Picture Frame

Next, spray paint your frame white (or any color you choose) and let dry.

Once you frame is dry, you will want to do some sanding. Lightly sand your frame to give it a farmhouse distressed look or keep as is.

Find the perfect piece of fabric to match your child’s bedroom or bathroom. Measure the back of your frame and cut out a piece of fabric the same dimensions. Lay your fabric aside.

Upcycled Picture Frame

Carefully glue your ribbon across the back of the frame (make sure the front of the ribbon faces the front of the frame) leaving an even amount of space in between each ribbon to fit bow. You can do one ribbon pattern (as we have) or multiple patterns.

Afterward, glue your fabric piece (front of fabric facing toward front of frame) to the frame along the edges making sure the fabric is pulled tight!

Homemade Hair Bow Holder

Finally, if you choose, you can glue the back of the frame back on but leave the glass out.

Clip your bows to the frame and display in your room.

Enjoy!

Open Picture Frame Hair Bow Holder

Excuse the quality of this photo. I made this frame ten years ago. I wanted to share with you another option, a bow holder without a fabric backing. I also used different patterned ribbons and allowed the color of the wall to come through between an open frame. Just consider it an option. I did find when putting the alligator clips on the ribbon, I was always attempting not to scratch or nick the all. So while the wall paint coming through was pretty. I had to be careful to not scratch up the wall!

Upcycle an old frame with this Farmhouse Bow Holder craft. This hair bow holder brightens a girls bedroom or brings style to a kid's bathroom. #FrugalCouponLiving #upcycle #hairbow Click to Tweet

homemade hair bow holder


Love crafting? Take a look at these Weekend DIY Farmhouse Projects. Pin to Pinterest.

Make your own Homemade Chalk Paint. Details on our Upcycled Farmhouse Table. Pin to Pinterest.


WHAT’S TRENDING? Looking for a few engaging activities? Grab Minute to Win it Games – Traditional, Holiday, Group, and more! Use these fun activities in the office, classroom, or at your next birthday party.

Signed, Sealed, Delivered Valentine Envelope Snacks with Fondant

This post may contain affiliate links or ads. Read my privacy policy and disclosure policy here.

March 29, 2019 by Ashley at Frugal Coupon Living Filed Under: Facebook, Instagram, Pinterest, Recipe, Social Media, Valentine's Day

published date: January 04, 2019
modified datt: March 29,2019

Sign, sealed, delivered! This fun food craft for the kids, Valentine Envelope Snacks is made with fondant, graham crackers, and some Valentine’s Day heart embellishments! Send to someone with love!

Valentine Envelope Snacks

Valentine's Day Cookie Envelopes

What do you do with the kids to celebrate Valentine’s Day. Every day in the month of February (until the 14th), we put a heart on the kids door sharing why they are special/loved. This has been done for as long as I can remember, we still have last years hearts on the door! It used to be something only my husband and I did, but as the kids multiplied (we would be doing 5 hearts a night for 14 days), I started including the children in the tradition so they could encourage and love one another. So we assign them a night they write a sweet note to each other. It gives us a few days off! I love watching, as well, how much they enjoy encouraging each other!

Sign, sealed, delivered!

Speaking of showing love, how precious are these Valentine Envelope Snacks? We love  Valentine’s Day Kids Food Crafts and wanted to come up with some new ideas for you all to enjoy this season! If your child has wanted to try fondant, this is a great and simple way to get started as it is such an easy snack! For this task, you will need white fondant and edible food markers then a big imagination! Send with love!

Valentine's Day Food Craft for Kids

Valentine Envelope Snacks Supplies:

  • 10 graham cracker squares
  • Wilton white fondant
  • Wilton red edible food marker
  • pink or white frosting
  • small square cookie cutter – we used this Wilton set
  • rolling pin
  • powdered sugar
  • small candy hearts, cinnamon hearts or heart sprinkles
  • toothpicks

*Makes 10 Valentine Envelope Treats


Print
clock clock iconcutlery cutlery iconflag flag iconfolder folder iconinstagram instagram iconpinterest pinterest iconfacebook facebook iconprint print iconsquares squares iconheart heart iconheart solid heart solid icon

Signed, Sealed, Delivered Valentine Envelope Snacks with Fondant

  • Author: Ashley at Frugal Coupon Living
  • Prep Time: 15 minutes
  • Total Time: 15 minutes
  • Yield: 10 1x
Print Recipe

Ingredients

Scale
  • 10 graham cracker squares
  • Wilton white fondant
  • Wilton red edible food marker
  • pink or white frosting
  • small square cookie cutter
  • rolling pin
  • powdered sugar
  • small candy hearts
  • toothpicks

Instructions

First, line a baking sheet with parchment or wax paper.

Gently knead the white fondant until pliable. Take a small handful of fondant at a time and gently roll out to 1/4″ thick using the rolling pin. If the fondant gets sticky, use the powdered sugar on your rolling pin and surface to prevent sticking.

Once the fondant is rolled to about 1/4″ use the square cookie cutter to cut the fondant into small squares.

Set the fondant squares on the baking sheet for 30-60 minutes to set.

After the fondant hardens a bit spread a small amount of frosting on the back of the square and place on top of the graham cracker.

Next, use the edible food marker to make 4-5 dashes on on all sides of the square and then a small triangle in the middle.

finally, use the toothpick to place a small amount of frosting on the back of the candy heart and then affix onto the ‘envelope flap’.

Repeat with all 10 graham crackers.


Did you make this recipe?

Tag @frugalcouponliving on Instagram and hashtag it #frugalcouponliving

Recipe Card powered byTasty Recipes
Sign, sealed, delivered! This kids food craft is made with fondant, graham crackers, and some Valentine's Day heart embellishments! Send to someone with love! #FrugalCouponLiving #valentinesday Click to Tweet

Valentine Envelope Snacks Directions:

First, line a baking sheet with parchment or wax paper.

Gently knead the white fondant until pliable. Take a small handful of fondant at a time and gently roll out to 1/4″ thick using the rolling pin. If the fondant gets sticky, use the powdered sugar on your rolling pin and surface to prevent sticking.

Once the fondant is rolled to about 1/4″ use the square cookie cutter to cut the fondant into small squares.

Set the fondant squares on the baking sheet for 30-60 minutes to set.

After the fondant hardens a bit spread a small amount of frosting on the back of the square and place on top of the graham cracker.

Next, use the edible food marker to make 4-5 dashes on on all sides of the square and then a small triangle in the middle.

Finally, use the toothpick to place a small amount of frosting on the back of the candy heart and then affix onto the ‘envelope flap’.

Repeat with all 10 graham crackers.

Fondant Valentine's Day Recipes


Don’t forget your teachers! Make them the envelopes are enjoy these Valentine’s Day Teacher Printables. Pin to Pinterest.

Enjoy these Valentine’s Day Food Crafts. We think the envelopes are a perfect fit! Pin to Pinterest.


WHAT’S TRENDING? Looking for a few engaging activities? Grab Minute to Win it Games – Traditional, Holiday, Group, and more! Use these fun activities in the office, classroom, or at your next birthday party.

Sausage and Ricotta Pizza Stuffed Cheese Bread

This post may contain affiliate links or ads. Read my privacy policy and disclosure policy here.

March 29, 2019 by Ashley at Frugal Coupon Living Filed Under: Facebook, Instagram, Pinterest, Recipe, Social Media

published date: December 22, 2018
modified datt: March 29,2019

Ooey, Gooey, cheesy goodness – this Sausage and Ricotta Pizza Stuffed Cheese Bread really hits the spot. An easy homemade pizza recipe the entire family will enjoy.

Sausage and Ricotta Pizza Stuffed Cheese Bread

Sausage and Ricotta Pizza Stuffed Cheese Bread

So late last year (2017), I gave birth to twins. Everything was as smooth sailing as smooth sailing goes (with twins that are your 4th and 5th children) until the reflux it. Let me tell you. I had 5 kids, two who suffered mild colic but this colic was the worst. Constant screaming. Weeks of it. It was in my research and talking to others, I discovered my son had a dairy allergy. With that came a 6 month strike of dairy – it was awful. No cheese, no milk, no butter – you try and find meals that have no dairy in them. Anyways, upon the graduation of breast feeding (I was really pumping), came all the cheese I could eat. All the GOOD cheese I could eat. That included this heavenly dinner recipe – Sausage and Ricotta Pizza Stuffed Cheese Bread.

As a woman CRAVING cheese, this stuffed pizza recipe hit the spot. I mean really hit the spot. This dinner recipe is so delicious. You, and your family, will love it! I promise.

Ooey, gooey, cheesy goodness – enjoy!

Sausage and Ricotta Pizza Stuffed Cheese Bread Ingredients

Ingredients:

  • 2 lbs. Ground mild Italian sausage
  • 1 ½ – 2 cups Pizza sauce
  • 2 cups Mozzarella cheese
  • ½ cups Parmesan cheese
  • 2 cups Ricotta cheese
  • 1 ½ tsp. Oregano
  • 2 tsp. Basil
  • 2 Cloves of garlic minced
  • 1 Onion chopped
  • 2 Loaves of French bread
  • Salt and pepper to taste
  • 1 tbsp. Coconut oil


Sausage and Ricotta Pizza Stuffed Cheese Bread

Directions:

1.) Preheat the oven to 425 degrees.

2.) Place 1 tablespoon of coconut oil into a large skillet over medium high heat. Add the chopped onion to the skillet, and cook until the onion has browned, is soft, and translucent. Set the onion aside in a bowl and keep warm.

3.) Add 2 pounds of ground Italian sausage to the same skillet, and cook until browned, chopping up any large pieces with a cooking spoon.

Browned Meat in Skilled

4.) When the meat is just browned, add in a mix of 1 ½ teaspoons of Oregano and 2 teaspoons of Basil.

5.) Add in 2 cloves of minced garlic.

6.) Pour in 1 ½ to 2 cups of pizza sauce. Stir to combine all of the ingredients well, and add salt or pepper to taste.

Tomato Sauce and Meat

7.) While the meat is browning, hollow out the insides of two loaves of French bread. Set the bread from the inside of the loaves aside to use in another dish as you see fit.

Hallowed Italian Bread

8.) Place one cup of ricotta cheese into each hollowed out loaf of bread, and smooth it out with the back of a spoon.

Spread Ricotta Cheese

9.) Top each loaf of bread with half of the meat mixture.

Sausage and Ricotta Pizza

10.) Add 1 cup of mozzarella cheese to the top of each loaf of bread on top of the meat mixture.

11.) Sprinkle ¼ of a cup of Parmesan cheese on the very top of the loaves of bread.

Sausage and Ricotta Pizza Bread

12.) Place the bread into the oven on a baking sheet for 8-10 minutes until the cheese on the top has browned and become bubbly.

Baked Sausage and Ricotta Pizza

13.) Serve with a garnish of herbs and a side of fresh salad greens.

Enjoy!

Print
clock clock iconcutlery cutlery iconflag flag iconfolder folder iconinstagram instagram iconpinterest pinterest iconfacebook facebook iconprint print iconsquares squares iconheart heart iconheart solid heart solid icon

Sausage and Ricotta Pizza Stuffed Cheese Bread

  • Author: Ashley at Frugal Coupon Living
Print Recipe

Ingredients

Scale
  • 2 lbs. Ground mild Italian sausage
  • 1 ½ – 2 cups Pizza sauce
  • 2 cups Mozzarella cheese
  • ½ cups Parmesan cheese
  • 2 cups Ricotta cheese
  • 1 ½ tsp. Oregano
  • 2 tsp. Basil
  • 2 Cloves of garlic minced
  • 1 Onion chopped
  • 2 Loaves of French bread
  • Salt and pepper to taste
  • 1 tbsp. Coconut oil

Instructions

  1. Preheat the oven to 425 degrees.
  2.  Place 1 tablespoon of coconut oil into a large skillet over medium high heat. Add the chopped onion to the skillet, and cook until the onion has browned, is soft, and translucent. Set the onion aside in a bowl and keep warm.
  3. Add 2 pounds of ground Italian sausage to the same skillet, and cook until browned, chopping up any large pieces with a cooking spoon.
  4. When the meat is just browned, add in a mix of 1 ½ teaspoons of Oregano and 2 teaspoons of Basil.
  5. Add in 2 cloves of minced garlic.
  6. Pour in 1 ½ to 2 cups of pizza sauce. Stir to combine all of the ingredients well, and add salt or pepper to taste.
  7. While the meat is browning, hollow out the insides of two loaves of French bread. Set the bread from the inside of the loaves aside to use in another dish as you see fit.
  8. Place one cup of ricotta cheese into each hollowed out loaf of bread, and smooth it out with the back of a spoon.
  9.  Top each loaf of bread with half of the meat mixture.
  10. Add 1 cup of mozzarella cheese to the top of each loaf of bread on top of the meat mixture.
  11. Sprinkle ¼ of a cup of Parmesan cheese on the very top of the loaves of bread.
  12. Place the bread into the oven on a baking sheet for 8-10 minutes until the cheese on the top has browned and become bubbly.
  13. Serve with a garnish of herbs and a side of fresh salad greens.

Did you make this recipe?

Tag @frugalcouponliving on Instagram and hashtag it #frugalcouponliving

Recipe Card powered byTasty Recipes
Ooey, Gooey, cheesy goodness - this Sausage and Ricotta Pizza Stuffed Cheese Bread really hits the spot. An easy homemade pizza recipe the entire family will enjoy. #FrugalCouponLiving Click to Tweet

Sausage and Ricotta Pizza Stuffed Cheese Bread


Want another pizza recipe? Take a look at this Pillsbury Biscuits Deep Dish Pizza Recipe. Pin to Pinterest.

Also enjoy one of our favorite recipes including Homemade Pepperoni Pizza Twists with Crescents. Pin to Pinterest.


WHAT’S TRENDING? Looking for a few engaging activities? Grab Minute to Win it Games – Traditional, Holiday, Group, and more! Use these fun activities in the office, classroom, or at your next birthday party.

Be the Good Kid Quote | DIY Easy Bedroom Canvas Tutorial

This post may contain affiliate links or ads. Read my privacy policy and disclosure policy here.

March 29, 2019 by Ashley at Frugal Coupon Living Filed Under: Crafts, DIY, Facebook, Instagram, Pinterest, Social Media

published date: December 08, 2018
modified datt: March 29,2019

Be the Good Kid Quote. We turned one of our favorite quotes into a Canvas for under $20.  Inspirational quote for girls and boys turned into DIY bedroom artwork – no canvas or paint required!

Be the Good Kid Quote

I have so much I want to teach my girls. I think of the most random “lessons” I want to share with them, but something makes it not the right timing. I quickly retain those ideas in my head and often they get buried beneath mundane day to day information.  Recently, I have found the best way to inspire my girls is through quotes that lead to their own self reflection. I have them read a quote, think about it and then we discuss it. This gives them ownership in their own beliefs without me instilling my own ideology in their head.


Be the Good Kid Quote:

So this craft project actually took no supplies. I am not joking. Using my computer mouse and keyboard, I created this DIY canvas online… you guys it was ridiculously easy!

First, I ordered this Be the Good Kid Quote online on Etsy. This was an instant download so as soon as I made my purchase for under $5. I paid $4.99 to be exact. This is the only “supply” you need for your kid’s quote project.

Tip: If you cannot see your download after you purchase, go to purchases and reviews under your account. From there, find your purchase and click Download Files.

Directions for Your DIY Canvas:

Once you have downloaded your Be the Good Kid Quote you will want to purchase a discounted canvas voucher online. One of my favorite places to purchase canvas prints is on Canvas on Demand, Canvas Champ and Canvas People. I normally take a look at Groupon to find a discounted canvas voucher first.  I found this Canvas on Demand Groupon Voucher, one 16×20 Canvas Print for $15. I doubt this price/voucher will last – so get it while you can!

Tip: This PDF printable from Etsy is 8 x 10 inches, so you want to order a canvas size that will fit. Order an 8×10 canvas, 16×20 canvas, or anything with a ratio of 4:5.

Canvas Print Deals
After I purchased the voucher, I went to my Groupon account and under my account chose My Groupons. There you can get your unique promo offer for your free canvas (you have already purchased it.) Follow the directions on your voucher. On the canvas merchant page, you will upload your Etsy download (instead of a photo.)  Your canvas will arrive and look like you hand lettered it yourself!

What a creative way to place some inspiration in your child’s room. Remind them to be the good kid. Remind them to be the kind kid!

Be the Good Kid Quote. We turned one of our favorite inspirational quotes into a Canvas. This quote for boys and girls is an easy DIY bedroom artwork - no canvas or paint required! #FrugalCouponLiving #Quotes Click to Tweet


Going to hand letter this on your own? If you lack some hand lettering skills, take a look at this Hand Lettering Tutorials For Beginners. Pin to your Craft Board on Pinterest.

If decorating for a teen’s bedroom, take a look at these Inspiring Teenage Bedroom Ideas. Pin to your home and kids Pinterest Board.


WHAT’S TRENDING? Looking for a few engaging activities? Grab Minute to Win it Games – Traditional, Holiday, Group, and more! Use these fun activities in the office, classroom, or at your next birthday party.

  • « Previous Page
  • 1
  • …
  • 158
  • 159
  • 160
  • 161
  • 162
  • …
  • 272
  • Next Page »
  • Search
  • Social
  • Categories
  • Archives
Search
  • Email
  • Facebook
  • Instagram
  • Pinterest
  • Twitter
Browse By Category
Browse by Date
I am a wife, mother, daughter, blogger, teacher, friend – a woman of many different hats. My delights are my husband, my five kids, reading, shopping, and spending time with friends and family. I am a Florida girl transferred to the heart of the DC-Metro area. I'm glad you're here! Learn more about Ashley.

Daily Deals – Don’t Miss One!

December 2025
S M T W T F S
 123456
78910111213
14151617181920
21222324252627
28293031  
« Nov    

Copyright © 2025 Frugal Coupon Living | CCPA Policy | Privacy Policy | Disclosure | Disclaimer | Terms of Use | Do Not Sell My Personal Information | Email Sign Up