Frugal Coupon Living

Stretching Your Pennies, Saving Your Dollars

  • Email
  • Facebook
  • Instagram
  • Pinterest
  • Twitter
  • Home
    • Home Page
    • About Ashley at Frugal Coupon Living
    • Contact
  • Shop
    • Frugal Coupon Living Shop
    • Etsy Store
    • TPT Shop
    • Elf Printables
    • Shipping Policy
  • Printables
    • Shop
    • All Printables
    • Free Printables Library
    • Free Elf Printables
  • Games
  • Party
  • Deals
  • Seasonal
    • Easter
    • Spring
    • April Fools Day
    • Mother’s Day
    • Father’s Day
    • Summer
    • Back to School
    • Halloween
    • Thanksgiving
    • Black Friday & Cyber Monday
    • Christmas
    • New Year’s Eve
    • Valentine’s Day
    • All Seasonal
  • Christian Resources
    • Christian Resources Shop
    • TPT Christian Crafts
    • Etsy Christian Prints
    • Youth Group Games
    • Sunday School Lessons
    • Scripture Cards
    • More Christian Resources

DIY Halloween Potion Bottles

This post may contain affiliate links or ads. Read my privacy policy and disclosure policy here.

September 29, 2018 by Ashley at Frugal Coupon Living Filed Under: Crafts, DIY, Facebook, Halloween, Instagram, Pinterest, Social Media

published date: August 26, 2017
modified datt: September 29,2018

Save old glass jars and containers to make these up-cycled DIY Halloween Potion Bottles. We love this creative Apothecary Halloween Craft to make the most Boo-tiful decor for the October season.

DIY Halloween Potion Bottles

Pin to Pinterest

If you are anything like me, you save glass bottles & jars in hopes of making them into something new & exciting. I love a pretty mason jar, and even some salad dressing jars speak to me, so in no time I can have a decent collection of them begging to be up-cycled.

Halloween is one of the best times of the year to utilize those. You can make cute storage jars, fun character crafts on them, or in this case, some pretty potion bottles for decoration.
I had the Crown Royal bottle for a while, saving it for just the right project, because it’s such a pretty bottle, but let’s face it, not exactly the right theme to put out for just anything, so this was it. But, you don’t have to have a fancy bottle to make these. The taller one I used had been a bath salt I had made last fall, and the label was still on it, so I decided to just paint right over it, making it look more finished off, instead of trying to remove it and leaving a torn paper on the bottle instead. So, if you have bottles with labels, as long as the label is well fixed, paint right over it! Don’t hesitate to try to utilize things you may not have thought would work, sometimes the outcome will surprise you.

DIY Halloween Potion Bottles

Supplies:

  • 1 or 2 glass bottles of your choice
  • Metallic finished spray paints of at least 2 colors* – we used a silver and a gold
  • Black acrylic paint or a black paint marker**
  • Washi tape if desired – this is a way to get a more finished off look or a handmade label without too much work
  • Buttons – anything metallic to Halloween color
  • Baker’s Twine or string to attach buttons as needed
  • Scissors
  • Super glue

*I used a metallic silver, which by the lid looked like it would be shiny and reflective, but it was actually more matte, and I was happy it was – then I used a hammered finish one that is more of a pewter/ copper, to contrast that silver – Gold would work too, you just want more than one type

** If you are using the paint, you will need a plate, and a thin paint brush, water cup and paper towel.


To begin, be sure the bottles are nicely cleaned and dried, then, if you plan to actually use the bottles for storage, remove the lids from them when you paint so they don’t dry and tear the paint when opening them later.

You can go ahead and lay all pieces out to spray. (I left my lids on, since I knew they would only be for decoration.)

Spray the lighter shade of color on the bottles first, you want the darker one to be on top for contrast and you will use less of it.

Let them air dry for a good 20-30 minutes. After that time, check the spray paint to see how well covered the bottle is, if it needs any more coating, and if so, go ahead and spray it again. Then, give it another 20 minutes and check to see if it is dry.

Once the layer is well covered and the bottles are dry, you can use the darker colored spray paint. I shook mine up, but not as much as I normally would’ve, because I actually wanted it to come out a little uneven and maybe even chunky in a spot or two. It worked well, too. What you want to achieve is a light coat of it around the edges of the bottle, to look more like wear and discoloring than a full coat of paint. I tried to leave the label areas open, with the lighter color only on them, so that it would be easier to paint on and read later. This layer of paint only took one coat and I just very lightly went back and forth with the spray paint, hitting it here and there. Some of this is of course, your preference.

Now, let that coat fully dry.

While you are waiting on that, you can start arranging your buttons and deciding how you want to lay out the decorations on the bottles. I went with washi tape on the top, thinner part of the bottle, because I felt it was too skinny to try and paint any wording there or anything. The top curve of the bottle where it gets wider is the perfect place to make a focal point. So, think about adding washi tape there and your buttons.

Now, if your buttons are flat, then all you have to do is glue them on, unless you want to add the twine anyway, for looks. Otherwise, the baker’s twine is the way you are going to attach the buttons. Tying the twine through the back loop on each button and then letting it hang just a bit off the bow is perfect. I used a combination of both types of buttons.

So, once your bottles are dry, get your glue, your paint marker and your washi tape ready.

Look over the bottles and choose which side you like the best, and make that the front side of the bottle.

Add the washi tape wherever you decided to first, being careful to keep it nice and straight, and smooth it out nicely. It’s important to go slowly as you do this, otherwise if you have to pull it back up, it may tear the paint off the bottle, depending on how strong it is.

Next, you will want to add some nice lines here and there to represent labels on the bottles. You don’t have to add wording if you don’t want to, but the paint marker makes that easier for you if you aren’t good at hand-painting lettering. With the paint marker, you will need to shake it up a lot to get it started, and then using a scrap piece of paper, press down on it to bring the paint to the tip. I practiced on the paper first, to get used to the paint flow. It can tend to be uneven and you sometimes have to go back and press the tip down again when it dries up.

If you are using a paint brush, you obviously won’t have to bother with any of that part. Go ahead and paint on your lines – there is no right or wrong to this, I would just advise to go slowly and to follow the curves on the bottle or the label area and don’t over-do it. Less is sometimes more.

Let the paint dry once you’re done and then you can add the twine and buttons.

Measure out the baker’s twine around the bottle to be sure you have plenty to work with, figuring for the knots, and then cut that. Run the twine around the neck and tie a good knot to keep it in place, and then make a bow. Once the bow is done, go ahead and tie on any buttons you need to. Double knot them on the back and if you like, add a drop of glue so they won’t loosen. Then, glue on any buttons to the bottles themselves by adding a drop of glue to the back and then holding firmly in place for a minute to be sure they won’t fall off.

Now, set the bottles back from you a bit and give them a good once over – if they look completed to you, then you are all set! If they need any touch ups or additions of buttons or lines, go ahead and finish that off.

Happy Halloween!


Create your own DIY Halloween Mason Jar Snow Globes. Pin to Pinterest.

Also check out our 31 Days of Kid’s Halloween Food Crafts. Pin to Pinterest.

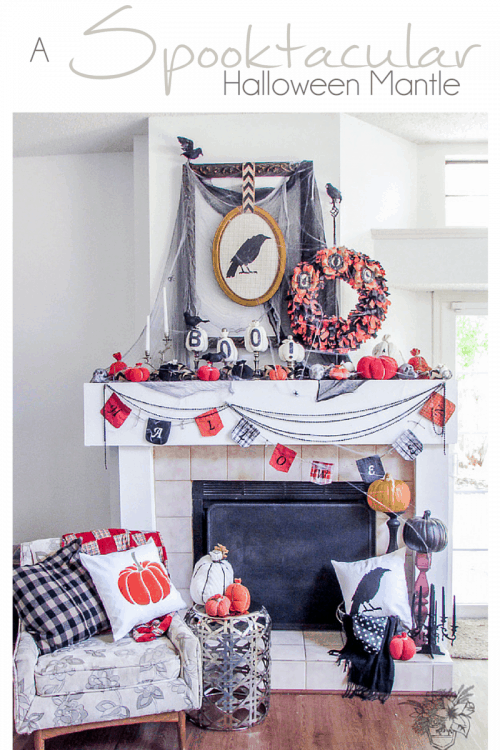
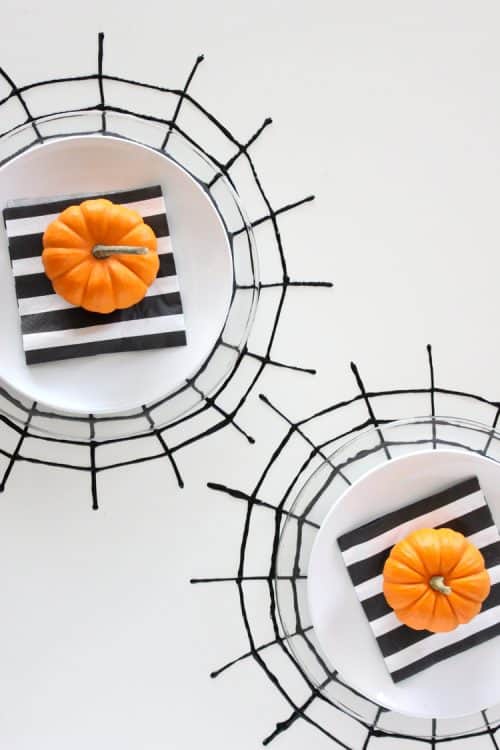
If decorating, take a look at these 31 Halloween Mantles and Tablescapes. Pin to Pinterest.

If you are going out for a night on the town collecting candy, you have to have the cutest backdrop for your Halloween photos. Take a look at these Boo-tiful Porch Halloween Ideas and Patio Inspiration. Pin to Pinterest.

We think these 31 Halloween Hacks & Tips are pretty fun too! Pin to Pinterest.


WHAT’S TRENDING? Looking for a few engaging activities? Grab Minute to Win it Games – Traditional, Holiday, Group, and more! Use these fun activities in the office, classroom, or at your next birthday party.

Cricut Monogram Tutorial

This post may contain affiliate links or ads. Read my privacy policy and disclosure policy here.

September 16, 2018 by Ashley at Frugal Coupon Living Filed Under: Crafts, DIY, Facebook, Instagram, Pinterest, Social Media

published date: December 13, 2016
modified datt: September 16,2018

cricut-monogram-tutorial-frugal-coupon-living-short

Cricut Monogram Tutorial

Pin to Pinterest

Cricut is a personal electronic cutting machine cuts vinyl, paper, fabric & more. The DIY craft cutter is simple to use for scrapbooking, home décor, card making and monogramming! If you are like me, having a new electronic can be intimidating and take a little getting used to. We have produced a brain free, step-by-step Cricut Monogram Tutorial to help you get starting making your first vinyl monogram!


Powered by Creative Market

Before you begin, fonts are so important for monograms. Print your Fonts into a Font Catalog – less than 5 minutes! This is all the fonts you have on your computer. Pin to Pinterest.

Be sure to check out more crafty ideas in the Circut Design Space.

Enjoy.

Cricut Monogram Tutorial:

1. Open Cricut Design Space and select File, New.

2. Click insert images on the left. I typed circle into the search bar, but you could use an apple, square, etc. I picked two different circles so I can show you two types of monograms.

monogramtext2shape1

3. Click add text. I prefer to use a chunky or calligraphy type text for my monograms.As you can see, my text is lowercase, uppercase, lowercase.  However, you can change it up for your design.

monogramtext2shape2

4. I am going to start with the monogram on the left. This will be a layered monogram. Hit the unlock button on the text. This allows you to resize to fit inside your shape.

monogramtext2shape3

5. Right click the text and click ungroup. This let’s you adjust each letter accordingly. If you need to make each letter bigger or small you can click the unlock button on each letter to do this.

monogramtext2shape4

6. Hold your shift key and click each letter. Right click and pick group. Now your letters should be grouped back together. On the right hand side, click weld.

monogramtext2shape5

7. Right click the shape and pick ungroup. Move the back layer out of the way.

monogramtext2shape6

8. On the right hand menu you will see your current shape. This shape has 2 layers so I want to hide the back layer by clicking the “eyeball”. It is not gone, just hidden so you can work with the top layer only.

monogramtext2shape7

9. Highlight the letters and top shape and click Slice. Move the sliced letters out of the way. You can delete them at this point if you like.

monogramtext2shape8

10. Now you can unhide the back layer and put your 2 layers back together. YAY you now have a layered monogram. Perfect for a shirt, backpack, or more.

11. Now we will move on to the shape monogram. Steps are very similar. Start by ungrouping your text.

12. Click the unlock button on text and arrange the letters to look the way you want. I like to keep my middle letter bigger from top to bottom of my shape and adjust the side letters accordingly.

2monogramtext2shape1

13. On the right side menu, highlight the three letters and click Weld.

2monogramtext2shape2

14. Highlight the shape and text, click Slice.

2monogramtext2shape3

15. Now you can use the text by itself or the circle shape with the text cut out. Multipurpose!

Find more inspiration on Cricut’s Blog and the Circut Design Space. You can also shop the cutting machine collection at Cricut.com. Enjoy!


Powered by Creative Market


cricut-monogram-tutorial-frugal-coupon-living-long

Share-Post-on-Pinterest-Frugal-Coupon-Living

Take a look at these Cricut Freebies – Tutorials for Your Cricut Projects. Pin to Pinterest.

Don’t forget our second list of Cricut Freebies – Cricut Tutorials and Crafts. Pin to Pinterest.

Easy and Simplistic Tutorial on How to Make Stickers Using the Cricut Machine. Pin to Pinterest.

Fonts are so important for monograms. Print your Fonts into a Font Catalog – less than 5 minutes! This is all the fonts you have on your computer. Pin to Pinterest.

Also take a look at our Character Cake Tutorial – Thomas or Any Character! Pin to Pinterest.

character-cake-tutorial-collage-frugal-coupon-living

We also love this How to Build a Lemonade Stand with a Recycled Pallet. Pin to Pinterest.

how-to-build-a-lemonade-stand-collage-2-frugal-coupon-living

signature-frugal-coupon-living-2

WHAT’S TRENDING? Looking for a few engaging activities? Grab Minute to Win it Games – Traditional, Holiday, Group, and more! Use these fun activities in the office, classroom, or at your next birthday party.

Cricut Tutorial | How to Add Your Own Images to Cricut Design Space

This post may contain affiliate links or ads. Read my privacy policy and disclosure policy here.

September 16, 2018 by Ashley at Frugal Coupon Living Filed Under: Crafts, DIY, Facebook, Instagram, Pinterest, Social Media

published date: April 29, 2017
modified datt: September 16,2018

Easy Step by Step Circut Tutorial – How to Add Your Own Images to Cricut Design Space.

How to Add Your Own Images to Cricut Design Space

Pin to Pinterest

Getting started with a Cricut Machine can be intimidating. If you are like me you have a dozen crafts and projects you would like to design but when you first get your machine, you stare it frozen with where to begin. Add your own images is one of the first steps you will want to do when first exploring your machine. Doing these 10 steps will help you feel comfortable with your machine. The steps are simple but the accomplishment makes you feel like you actually took the first step in becoming comfortable with your new vinyl machine.

Take a look at these 10 easy step-by-step directions for uploading your own image to Cricut Design Space. Happy crafting!


Powered by Creative Market

Cricut Image Tutorial:

Adding your own images in Cricut Design Space is very easy and will have you going on new projects and having fun with your Cricut in no time.

1. First, open your Cricut Design Space. Once you have it open you will see the Upload Images tab on the left side. Click the tab.

2. This will take you to the upload image page. Click on the Upload Image tab as shown.

3. You will then you will be prompted to click the BROWSE button to upload your image.

4. Once you upload your image check the Simple image option. Then click the CONTINUE button.

5. Using the magic wand button as show, select the areas around your image. This will tell your Cricut to cut around your image.

6. Once all the areas around the image you want to cut out is cleared, click the CONTINUE button.

7. You will now be prompted to Save as a Cut image. Once checked click the SAVE button.

8. Your image will be added to your Uploaded Image Library. Select your image and then click the INSERT IMAGES button.

9. Now you will make your image the size you would like it to be cut. Using the DOUBLE ARROW button drag your image to your desired size.

10. Your image is now ready to be cut out. Click the GO button to begin cutting.

That’s it! You can find more inspiration on Cricut’s Blog and the Circut Design Space. You can also shop the cutting machine collection at Cricut.com. Enjoy!

Take a look at these Cricut Freebies – Tutorials for Your Cricut Projects. Pin to Pinterest.

Don’t forget our second list of Cricut Freebies – Cricut Tutorials and Crafts. Pin to Pinterest.

We love our Cricut Monogram Tutorial. Pin to Pinterest.

Easy and Simplistic Tutorial on How to Make Stickers Using the Cricut Machine. Pin to Pinterest.

Print your Fonts into a Font Catalog – less than 5 minutes! Pin to Pinterest.


WHAT’S TRENDING? Looking for a few engaging activities? Grab Minute to Win it Games – Traditional, Holiday, Group, and more! Use these fun activities in the office, classroom, or at your next birthday party.

Felt Board Quotes and Ideas

This post may contain affiliate links or ads. Read my privacy policy and disclosure policy here.

September 1, 2018 by Ashley at Frugal Coupon Living Filed Under: Crafts, Facebook, Home Improvement, Instagram, Pinterest, Social Media

published date: June 03, 2018
modified datt: September 01,2018

Take a look at these creative felt board quotes. Felt board ideas are both inspiring and funny.

Felt Board Quotes and Ideas

Felt Board Quotes and Funny Felt Board Ideas

I caved and I finally picked up a felt board for our family! They are so cute and I felt it was a really fun way to express yourself. You can see our first message. As a mother of five, I felt it was very fitting “Langston Family. Party of 7. If you think our hands are full, you should see our hearts!” It works, right? Often at the store, I get the expression – “Wow, your hands are full!” I am aware, no need for anyone in my grocery aisles to remind me! But you know what!?! My hands might be full, but these kids also fill my hearts. This felt board is just a little way for me to get that off my chest!

We found some of the cutest, creative and even funny felt board quotes. From ideas about food (namely donuts) to ideas to inspire you to make a difference in the world, these quotes are sure to make your felt board full the rest of the year!

Enjoy.

“If you think our hands are full, you should see our hearts.”

“Be the good. Believe there is good in the world.” Letterfolk

“It’s a good day to have a good day.” Brit + Co

“We go together like coffee and donuts.” B.Grace Creatives


“My kids are my cardio” Lactation Link

“If one door closes and another door opens… your house is probably haunted!” Frugal Coupon Living

“I never met a cake I didn’t like” Frugal Coupon Living

“We were together. I forget the rest.” Letterfolk

“I’m getting real sick of food having calories.” With Love from Ding

“Orange you glad it’s Friday?” Felt Like Sharing on Instagram (buy it here)

“Thank goodness I don’t have to hunt for food. I don’t even know where tacos live.” Letterfolk

“How to make iced coffee 1.) Have Kids 2.) Make Coffee 3.) Forget About It 4.) Drink it Cold” Nicki at Luck of the Irish Twins

“Don’t be so hard on yourself. The mom in E.T. had an alien living in her house for days and didn’t notice.” Lactation Link

“Less House, More Home.” Letterfolk

“Based on the amount of laundry… I’m going to assume that there are people living here I’ve never seen.” Unknown

Add your menu! The Kitchn


“Did you say exercise or extra fries?” Michelle Katigbak Alejandro

“Made with love means I licked the spoon and kept using it.” FUL Candles

SOCIAL WARFARE TWEET

“Surely not everyone was Kung Fu fighting.” Hive’tique

“Let us have a moment of silence for all the things we added to the cart but never bought.” May they be in good hands. Jenni Caughy

“She believed she could but she was tired, so she didn’t.” FUL Candles

“The more you weigh, the harder you are to kidnap. Stay safe. Eat cake.” Wander and Rose

“Yeah abs are great, but have you tried donuts?” Letter Love Goods


Take a look at these creative Gallery Walls – Ideas for Picture Frame Displays. Pin to Pinterest.

We love our Midsummer Night Patio Escapes. Pin to Pinterest.


WHAT’S TRENDING? Looking for a few engaging activities? Grab Minute to Win it Games – Traditional, Holiday, Group, and more! Use these fun activities in the office, classroom, or at your next birthday party.

Inspiring Farmhouse Fall Decor

This post may contain affiliate links or ads. Read my privacy policy and disclosure policy here.

August 23, 2018 by Ashley at Frugal Coupon Living Filed Under: DIY, Facebook, Home Improvement, Instagram, Pinterest, Social Media, Thanksgiving

published date: October 08, 2017
modified datt: August 23,2018

Inspiring Farmhouse Fall Decor on Frugal Coupon Living. Creative ideas for the Thanksgiving season including rustic metals, distressed woods, and orange and white pumpkins!

Inspiring Farmhouse Fall Decor

Fall Decor

Pin to Pinterest

This unpretentious style is distinctly all-American. Nodding to its homegrown roots, farmhouse style homes have a collected-over-time look, complete with old-school prints, distressed furnishings, and vintage finishes. When it comes to Farmhouse Decor, we never tire. From bedrooms to kitchens to porches, we have you covered for the fall and Thanksgiving season.

While putting together these beautiful Farmhouse Vignettes, we noticed some trending patterns. White pumpkins for sure. Use orange pumpkins to pop when you are using a neutral palette. Of course, pull from cursive and chalk lettering, rustic metals, and distressed woods. Pulling form the outside and bringing elements in the house is perfect for the fall season. Print in wheat, pine cones, cotton, stand out mums and of course pumpkins.  No need to kill time carving. The pumpkin alone is a perfect touch.

We can’t wait to see the charm you bring to your home this fall with these fall decor ideas!

Bring in the outdoors with this DIY Pinecone Garland Tutorial. This is stuning over the fireplace but really would look great over a hutch too! | How to Decorate

Have a spot in your home that can be easily changed every season? We love how this hutch immediately pops with the added touch of orange pumpkins. | Paint Me Pink

This blogger did an amazing job. Get a step-by-step tutorial for this Farmhouse Pumpkin Bucket – I love how she added the age to the bucket! | A Night Owl


Adding a pillow to a bench or chair can make all the difference in fall foyer. We love the fall decor in this foyer.  How sweet are those orange flowers, they really pull together with the pillows.| Home by Heidi

If white is your color, you want to see this fall home tour. I love the dinning room table fall vignette with white pumpkins and an old chippy watering can with neutral fall flowers. | Junk Chic Cottage

Follow this pumpkin vase tutorial to make your own Thanksgiving Farmhouse Centerpiece. | A Pumpkin and a Princess

I never knew what an Olive Bucket was but once I learned, I put on my list of things to have. We are loving these Mums in Olive Buckets. | On Sutton Place

I think I could scroll through pages an pages of this home tour, but for now I was inspired by the autumn porch decor. | Nesting with Grace

This foyer is different every holiday and today I am inspired by their fall decor… Chalkboards and Pumpkins! | Nest for Less

This table has a beautiful fall vignette. It’s amazing what you can pull together with just items from the outdoors.  This fall floral bouquet is perfect for the table. | Vibeke Design

Turn a pumpkin into a garden with succulents! You would be surprised how easy this succulent tutorial is and how easy succulets are to maintain. We suggest washing the pumpkin with bleach before planting.| Simply Happen Stance

Nothing says fall more than pumpkins and apples – make this homemade apple wreath with this tutorial. | The Wood Grain Cottage

Do you have glass domes and cloches (a small translucent cover for protecting or forcing outdoor plants) that are hidden in the cabinent? Pull them out and stack the inside with pumpkins and gourds. | Craftberry Bush

How about this centerpiece? White pumpkins, naturally-shed antlers, dried hydrangeas, and votive candles – all in shades of pale! | Tone on Tone

To decorate around art without distracting it, swap bright colors for simple elements like these pinecones and wheat stalks.  | Blesser House

Some might be had at hello, I was had at this Fall Coffee Table Vignette – beautiful! | Liz Marie Blog

Recreate this gorgeous vase of orange dahlias, bittersweet and an accent of pumpkins at the base as the centerpiece for your Thanksgiving table. | Lady Lux

How precious is this DIY Sign for Fall? So easy and such a sweet touch of fall decor. | House by Hoff

Fit as many miniature pumpkins and gourds as you can into a glass lantern. Place on the porch, a table or near the fireplace. | Celebrate Mag

Transform unused mason jars into a Fall Craft. | Sincerely Jean


Fall Decor

We also wanted to share with you some exciting Modern Farmhouse Fall Decor Finds.

Modern Farmhouse Fall Decor Finds

Pin to Pinterest

  1. Blue Velvet Throw Pillow
  2. Pumpkin Patch Wooden Sign
  3. White Distressed Wood Trays 
  4. Galvanized Pumpkin Pillar Holder Set
  5. Tree Bark Candle
  6. Macrame Wall Tapestry
  7. Votive Candle Birch Branch Centerpiece
  8. Decorative Wicker Basket
  9. Plaid Throw Blanket
  10. Tall Gray Resin Pumpkin Décor
  11. Metallic Pumpkin Figure
  12. Thanksgiving Pillow 

More Inspiration for your Fall Decor on Frugal Coupon Living

Take your decor design to the table. Enjoy these 25 Inspirational Thanksgiving Tablescapes. Pin to Pinterest.

Also check out these 31 Free Thanksgiving Printables. Pin to Pinterest.


WHAT’S TRENDING? Looking for a few engaging activities? Grab Minute to Win it Games – Traditional, Holiday, Group, and more! Use these fun activities in the office, classroom, or at your next birthday party.

31 Inspiring Halloween Mantles and Tablescapes

This post may contain affiliate links or ads. Read my privacy policy and disclosure policy here.

August 23, 2018 by Ashley at Frugal Coupon Living Filed Under: Crafts, DIY, Facebook, Halloween, Instagram, Pinterest, Seasonal, Social Media

published date: September 04, 2016
modified datt: August 23,2018

31-Inspiring-Halloween-Mantles-Tablescapes-Collage-frugal-coupon-living

31 Inspiring Halloween Mantles and Tablescapes

Pin to Pinterest

We love a decorated home. Any holiday, any occasion, any reason. These Mantles and Tables are inspiring for the Halloween season. Take a look at these spooky ideas, eerie scenes, and kid-inspired home ideas. There is something for all!

This Mantle of Curiosities has me shaking in my boots from Blackberry House. Using the vinyl on their mantle is creative, also like the recycled ladder with rats.

mantle-of-curiosities

There is no denying the time and attention detail placed in this Mad Scientist Halloween Tablescape from The Happy Heather.

happy-heathen-tablescape

Bringing a mirror with a web and some simple black candles creates this Stylish Halloween Mantle from Inspired by Charm.

stylish-halloween-mantel-decor


I thought for a second I was in a Pottery Barn Magazine for this Halloween Kid’s Table from Loralee Lewis. Such fun details and creativity!

kids-halloween-tablescape

I love the innocence of this Spooktacular Mantle from Pocket of Posies. It isn’t too scary and still matches her white living room. I get adding some battery operated candles at night would add some thrills.

Spooktackular-mantle

Tom Kat Studio has an amazing Halloween Glam Table with touches of green, black, and purple.

tom-kat-studio-halloween-Collage

You know, it doesn’t have to be too busy. Simplicity well thought out also makes a large statement like this Vintage Halloween Mantle from Lolly Jane.

vintage-halloween-mantel

Who would not love this Silly Halloween Tablescape from Glitterville Halloween. I love how everything has eyes!

silly-halloween-tablescape

Mix and Match both a Halloween and Autumn Mantle with fall leaves and gourds and spiders and crows from Sweet Something Design.

sweet-autumn-halloween-mantle

Finding Home Farms has an Elegant Spooky Tablescape. I love the crows on the plates.

Elegant-spooky-finding-home

Looking to buy some beautiful Halloween Decorations. Grandinroad has some amazing pieces. I love this mantle with pumpkins in the fireplace and a spiderwebbed bat runner.

Grandinroad-mantle

These Spider Web Placemats are such much easier than you think. I love the way Delia Creates used a simple napkin, pumpkin and allowed this DIY Spider Web Craft to stand out!

spider-web-placemats

Take a look at this Eclectic Halloween Mantle from Serendipity Redefined. I love the crow with the witch hat!

Serendipity-mandle-eclectic

Hostess with the Mostess has a Vintage Style Halloween Buffet for her friendly kid-themed party.

hwtm-vintage-halloween
Are you
seeing red in this Halloween Mantle – so creepy. Idea on Homedit.

red-mantle

Your Halloween Tablescape doesn’t have to be eclectic. Try someting like this Witch Plate Charger and Table Runner Tutorial from Made in a a Day.

table-tablerunner-witch-charger

How creative is this Dollar Store Halloween Mantle from The Shabby Creek Cottage, the crooked frames are so unique!

dollar-store-mantle

To the Moon and Back has a creative Burlap Tablecloth Halloween Tablescape – Make sure to save the date for October 31st!

save-the-date-moon-back

Landeelu used her own family to come up with this creative Halloween Mantles with Photos – I think the kids would love that!

halloween-photograph-mantle-collage

Whimsical is the best way to describe this Witches Garden Halloween Party from A Fanciful Twist.

How about this Halloween Mantle with Profiles – I just love the dog! Source Unknown.

profile-mantle

Once Upon a Plate has a Witch’s Cauldron Gift at each of her place settings on this Halloween Greetings Tablescape.

witch-cauldron-gift

This Chalkboard Halloween Mantle is fun, I love the reclining skeleton. It also comes free Halloween Printables including a Boo Banner and Chalk Prints from Lillian Hope Designs.

Chalkboard-Halloween-Mantle-printables

Smarty Had a Party has a fun idea using Recycled Newspaper to create a Halloween Tablescape with DIY Newspaper Pomanders.

smarty-pants-newspaper

House by Hoff has a Simple Halloween Mantle with a tutorial on DIY Jack-o-Lantern Signs.

mantle-jackolantern-signs

Beware of this Spiderweb Halloween Tablescape from the Tablescaper.

tablescaper-halloween

How eerie is the glow on this White Halloween Mantle on Cure Design Group. We love the dead twigs they brought in from the yard.

white-halloween-mantle

Use black construction paper or chalkboard paper for this Halloween Bat Centerpiece. Idea on Hester and Cook Instagram Page.

bat-place-setting

This Touch of Green Halloween Mantle from Positively Splendid is easy, simple, and not scary!

green halloween mantel

Take a look at this Crow Halloween Tablescape with Spider Cupcakes from Between Naps on the Front Porch.

Halloween-Tablescape-with-Spider-Cupcakes-Clock-Plates-a-Witchs-Hat-Centerpiece-crow-naps-porch

Still need help with your Halloween Mantle? Take a look at this Step-by-Step Halloween Mantle Guide on Handmade Mood.

step-by-step-halloween-mantle


Inspiring-Halloween-Tablescapes-Frugal-Coupon-Living

Inspiring-Halloween-Mantles-Collage-Frugal-Coupon-Living

Share-Post-on-Pinterest-Frugal-Coupon-Living

If you are going out for a night on the town collecting candy, you have to have the cutest backdrop for your Halloween photos. Take a look at these Boo-tiful Porch Halloween Ideas and Patio Inspiration. Pin to Pinterest.

Also check out our 31 Days of Kid’s Halloween Food Crafts. Pin to Pinterest.

31-days-halloween-food-crafts-frugal-coupon-living

Take a look at our 31 FREE Halloween Printables. Pin to Pinterest.

free-halloween-printables-frugal-coupon-living-short

We think these 31 Halloween Hacks & Tips are pretty fun too! Pin to Pinterest.

Halloween-hacks-and-tips-Collage-frugal-coupon-living-1000


WHAT’S TRENDING? Looking for a few engaging activities? Grab Minute to Win it Games – Traditional, Holiday, Group, and more! Use these fun activities in the office, classroom, or at your next birthday party.

Kids Science Experiments at Home | Baking Soda and Vinegar

This post may contain affiliate links or ads. Read my privacy policy and disclosure policy here.

August 22, 2018 by Ashley at Frugal Coupon Living Filed Under: Crafts, DIY, Facebook, Instagram, Pinterest, Social Media

published date: August 05, 2017
modified datt: August 22,2018

Science Experiments at Home for Kids on Frugal Coupon Living. Take a look at the chemical reaction produced from baking soda and vinegar!

Kids Science Experiments at Home | Baking Soda and Vinegar

Pin to Pinterest

The kids and I love to do crafts at home. Sometimes they enjoy it a little bit more than me! However, I try to be a good mother and do what I can to create excitement at home that is minimal and is an easy clean up. The former teacher in me, also makes sure the activity has some education involved. This baking soda and vinegar experiment is creative, crafty and something you as a mother can walk away from as they have fun playing with the patterns and colors – I think you can get away with telling them it is art!

So a quick description so you and your child understand what is going on. Baking soda (sodium bicarbonate) and vinegar (acetic acid) react with each other because of an acid-base reaction. One of the products this reaction creates is carbon dioxide, which creates all the fizzing as it escapes the solution.

Hey Mom! Did you know that you can unclog a drain with baking soda and vinegar! Pour a pot of boiling hot water down your drain and then ad about 1/2 cup of baking soda. Let that sit for a bit. After, pour 1 cup vinegar and 1 cup very hot water. Cover your drain with a plug to keep the chemical reaction going down. Let sit 5 to 10 minutes and flush out with more hot boiling water!

Baking Soda and Vinegar

Supplies:

  • 3 cups baking soda
  • 3 colors of food coloring
  • 16 oz bottle of vinegar
  • Straws
  • 9×13″ baking pan


Directions:

  1. Separate your baking soda evenly into 3 bowls, 1 cup in each.
  2. Add several drops of food coloring to each bowl to turn each cup of baking soda a different color.
  3. Mix your baking soda and food coloring together, you will have to use your fingertips as the food coloring tends to clump together.
  4. Pour your colored baking soda into your baking pan and lightly shake the pan so it spreads out evenly.
  5. Place your straw into your bottle of vinegar, place your finger tip on the top of the straw to hold the vinegar inside the straw, lift over to the pan of baking soda, and release your finger.
  6. You will notice the reaction of the vinegar combining with the baking soda.

Extension:

When baking soda and vinegar are combined they create an chemical reaction. Baking soda is a bicarbonate and vinegar is an acetic acid it creates carbon dioxide and water.

Have the kids place the vinegar where the colors connect too, do they mix together and make new colors?

Take a look at our Balloon Blow Up Experiment with Baking Soda and Vinegar! Have fun!


Have fun with science! Take a look at these Five Minute Science Experiments for Kids you can do in your home! Pin to Pinterest and save for later!

Also take a look at these Easy Borax Recipes!  Make creative crafts. The kids will never realize they are learning! Pin to Pinterest.


WHAT’S TRENDING? Looking for a few engaging activities? Grab Minute to Win it Games – Traditional, Holiday, Group, and more! Use these fun activities in the office, classroom, or at your next birthday party.

Upcycled Craft | Jellyfish Water Bottle

This post may contain affiliate links or ads. Read my privacy policy and disclosure policy here.

July 18, 2018 by Ashley at Frugal Coupon Living Filed Under: Crafts, DIY, Facebook, Instagram, Pinterest, Social Media

published date: May 20, 2017
modified datt: July 18,2018

Upcycled Craft | Jellyfish Water Bottle

Pin to Pinterest

This is a fun upcycled craft for the kids. Reuse an old water bottle and cut it down to create this fun jellyfish water bottle. We luckily didn’t have to buy anything because all the supplies were laying around our home. We love the blue and orange contrast but you could have fun create rainbow legs with pinks, yellows, greens, oranges, blues and more. This is a fun idea for Earth Day on March 20th. We also think it’s a cute idea to take into the preschool classroom for a summer craft session. Show us how yours turns out. We can’t wait to see!

Supplies:

  • Empty plastic bottle
  • A mix of blue and green craft paints
  • Foam paint brush
  • 1 1/2″ thick sheer orange ribbon
  • Hole puncher
  • Googly eyes
  • Scissors
  • Hot glue/hot glue gun


Directions:

  1. Cut the bottom of your water bottle off, about 3-4″ from the bottom and dry out the inside with a towel.
  2. Use a hole puncher to punch holes every 3/4″ across the open end edge.
  3. Squirt a small amount of blue and green paints onto a palette of a paper plate, paint the outside of your plastic bottle, and let dry.
  4. Cut your ribbon into 12″ pieces, place one piece at a time halfway into a punched hole, and tie into a knot until each hole has a ribbon.
  5. Carefully hot glue two googly eyes onto the front of your blue bottle.


Take a look at these fun Beach Inspired Party Ideas. Pin to Pinterest.

Have fun with these Vanilla Pudding Beach Cups. Pin to Pinterest.


WHAT’S TRENDING? Looking for a few engaging activities? Grab Minute to Win it Games – Traditional, Holiday, Group, and more! Use these fun activities in the office, classroom, or at your next birthday party.

  • « Previous Page
  • 1
  • …
  • 55
  • 56
  • 57
  • 58
  • 59
  • …
  • 98
  • Next Page »
  • Search
  • Social
  • Categories
  • Archives
Search
  • Email
  • Facebook
  • Instagram
  • Pinterest
  • Twitter
Browse By Category
Browse by Date
I am a wife, mother, daughter, blogger, teacher, friend – a woman of many different hats. My delights are my husband, my five kids, reading, shopping, and spending time with friends and family. I am a Florida girl transferred to the heart of the DC-Metro area. I'm glad you're here! Learn more about Ashley.

Daily Deals – Don’t Miss One!

December 2025
S M T W T F S
 123456
78910111213
14151617181920
21222324252627
28293031  
« Nov    

Copyright © 2025 Frugal Coupon Living | CCPA Policy | Privacy Policy | Disclosure | Disclaimer | Terms of Use | Do Not Sell My Personal Information | Email Sign Up