The easiest and cheapest way to update discolored recessed lighting. Take your dust traps and spider apartments from looking dusty, yellowed and dingy, to appearing brand new for under $10. Learn how to clean recessed lights and how to update recessed lighting with one home improvement supply!
Update Discolored Recessed Lighting


Want to know something funny? I stare at our dining room recessed lights so much, that I invested in this easy, low-cost hack twice. It was on my to do list so long, I bought my solution and then bought it again months later! Either way, I took my recessed lights from looking discolored and dated for under $7! I can’t wait to show you how.
Raise your hand if you agree recessed lights catch the most cobwebs and dust. I swear every time I turn on the light, it is like adding a spot light to the ugly mess of dust and spider houses. At least it limits the mount of decorating I must do for Halloween, right?
Why do recessed lights turn yellow?
There are a number or reasons recessed lights turn yellow. First, older light bulbs can put off a lot of heat. Between the heat and gasses, over time small chemical reactions take place discoloring your lighting cans. This can also occur from age and exposure to dust and other elements in the air.
How do you clean recessed lights?
Good news! Depending on the height of your ceiling, weekly or monthly cleaning of recessed lights is not a challenge. Make sure your lights are off and cool to the touch. Placing a damp cloth or touching a hot light bulb can lead to the light bulb exploding.
For lighting cleaning of recessed lights, use a Swiffer Duster Super Extender Handle. It will expend up to 6 feet and the small yellow fibers will grab onto dust and cob webs. If you have cathedral ceilings, consider getting a telescoping pole for lights that will come with a light bulb changing kit as well as a tool for dusting.
For deep cleaning of recess lights, remove the light bulb and simply wipe the bulbs. Next, use a damp cloth on the inside of the canisters and dry thoroughly before putting your light bulb back in the can. You can keep up with a rotating home cleaning task using a cleaning checklist.
Unfortunately, no matter how much you clean, you never will be able to remove yellowed recessed lighting. The dingy shade of yellow is from oxidation and chemical reactions. To improve the discolored metal, you need to buy new or paint recessed lights.
How do you update recessed lighting?
There are a number of ways to update recessed lighting. If you have the budget, you can replace recessed lights to Newer LED Can Lights. This project will take a little bit of learning or you can hire an electrician.
Sometimes instead of replacing recessed lighting with flush mount lighting, you can save a lot of money by doing something cheaper – buying LED Lightbulbs. You can buy LED light bulbs in bulk at
If you are updating the yellowed trim on recessed lighting, I highly recommend moving over to LED lights. This will bring down the heat emitted by light bulbs why they are turned on saving you both on your electric bill and also prevented your recessed lights form discoloring again.

Moving? Lighting is so important for selling a home. If you are home staging, you do not want to invest in expensive LED lights. Another option is to take your existing can lights and update discolored recessed Lighting for under $10 by painting them. This makes your home look fresh and your electrical work look brand new.
Home Staging Checklist Printable PDF
Can recessed lights be painted?
Recessed light white trim yellowed? The cheapest and easiest way to updated yellowed recessed lighting is to paint it. Spray paint is a low-cost home improvement project that only takes five minutes. If you are home staging, it can increase the value of your home removing signs of age or dated yellow can lights.
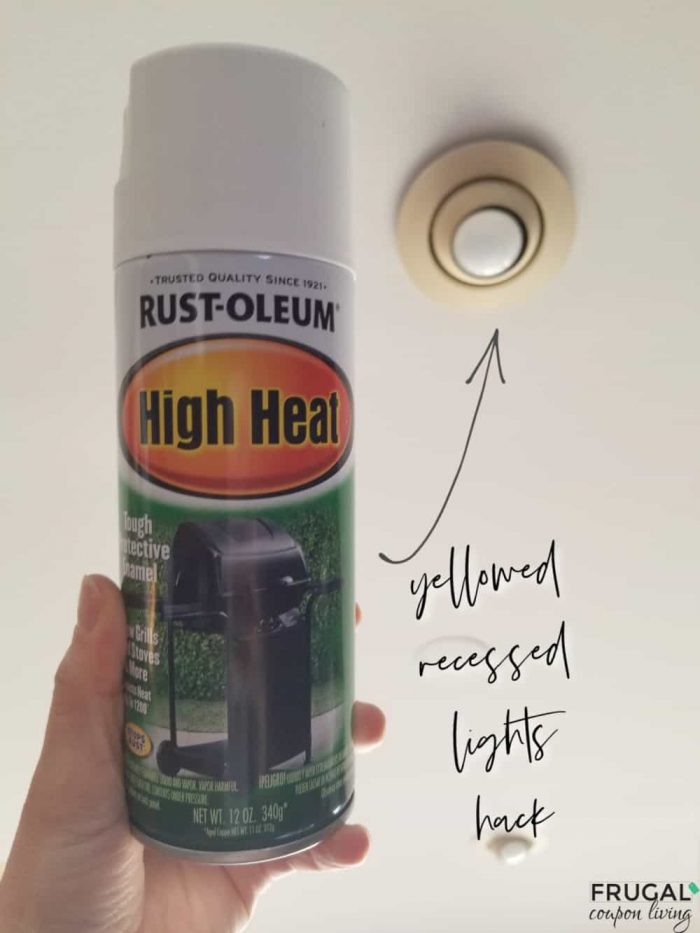
We have older recessed lighting. There is always the issue of heat so I picked up Rust-Oleum High Heat Enamel Spray in White for a low cost. The high heat spray paint protected surfaces subject to heat up to 1000°F. I knew my recessed lights were not getting that hot, so I felt sure this was the right product for us.
Because of the height, I had my husband remove the lights bulbs and then the recess cans from the ceiling.

First I cleaned the canned lights with an all surface spray and a dusting cloth. I let them sit a bit to dry. After they dried, I numbered my light cans in order so I knew where t place them after I was done. While, I think the canned lights could fit in in of the holes in the celling, I find it best to keep them in their original spots.

I took an upcycled box and spread it out on my deck. Once try, I placed the metal cans on the cardboard and I lightly coated each recessed lighting can with the high heat paint. The white spray paint dried to the touch in 20 minutes.

Because our recess lights can tilt at different angles I sharply tilted the light and gave them a second coat. After everything was dry to the touch, I sharply tilted the lights in the opposite direction and gave the lights a final touch of white paint.
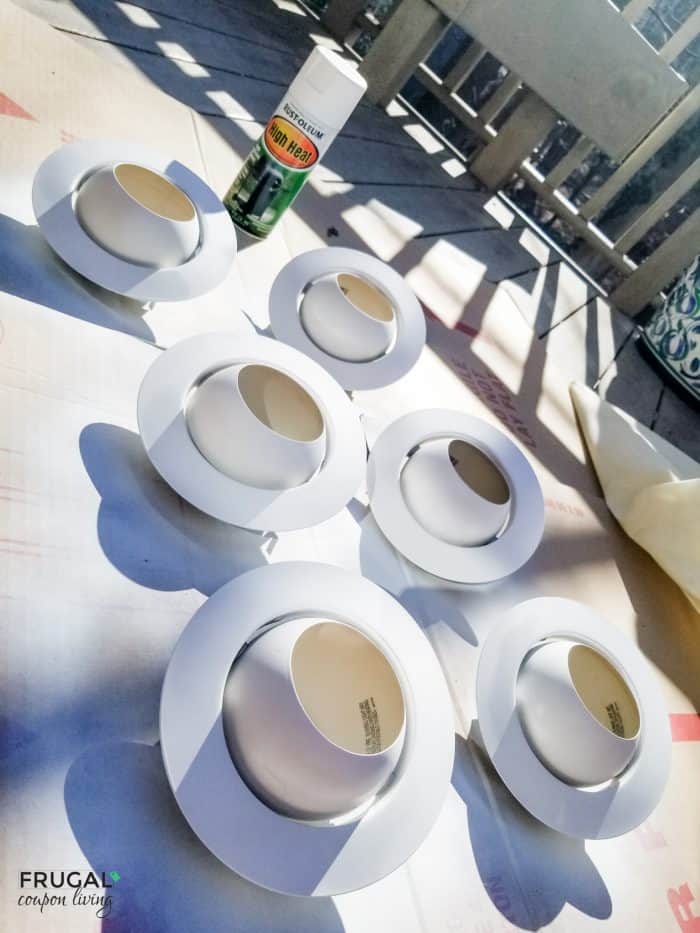
After three coats, we let them sit for up to 4 hours for good measure. The white paint for recessed lights had a pretty quick dry time, but I wanted to be sure they were dry before i started touching them to put them back in the ceiling.

I kept track of my numbered lights and placed them all back in the spot they came from.

Don’t they look amazing?! Well worth my $7 investment and they look like brand new lights!

Low-Cost Home Staging
Don’t forget these Older Home Hacks and Low-Cost DIY Renovations. I am slowly making my way down the list checking off so many projects on the weekend! Pin to Pinterest.

Also enjoy these Home Staging Hacks – for moving or sticking around! Incase the value of your home with just a few dollars, just like we did with these recess lighting home staging project! Pin to Pinterest.


WHAT’S TRENDING? Looking for a few engaging activities? Grab Minute to Win it Games – Traditional, Holiday, Group, and more! Use these fun activities in the office, classroom, or at your next birthday party.
Last Updated on April 4, 2022 by Ashley at Frugal Coupon Living


